Sunday, November 29, 2009

Everything old is New Again, Retro Look in Kitchens


Those of us who are old enough to remember the original “Hollywood Squares” TV show will remember one of the funniest persons that ever graced a stage, Paul Lynde. Lynde, who spoke with an affected manner and flamboyant style was famous for his quick and sometimes cutting wit. When asked one day to veriiy the quote “if a woman keeps a dress long enough that eventually it will come back in style”, Lynde answered “I hope so because I never throw anything away”. Well home styles and especially kitchens are beginning to take on the same philosophy. The 50’s look of the space age modernism and bright colors gave way to Mediterranean style with its dark wood and avocado appliances and then to bright white, clean flat formica surfaces of the 80’s and finally to the most recent trend to hard surfaces and stainless steel finished off with the industrial kitchen look. Now I read over the weekend that the 50’s look is coming back. I guess it should be no surprise for those of us who are fans of Rachael Ray. Her stage kitchens both in her 30 Minute Meal program for the Food Network and her daily syndicated show have long featured remakes of old appliances in bright colors, a kitchen, where the bright aqua cabinetry and orange countertops set the tone for the 50s-style décor and an orange modern version of the old kitchen stove and an aqua blue refrigerator that looks just like the one we had in my family home when I was growing up but when its opened its appears to be a modern appliance with an old shell on it.
Maybe it's the cheery enameled surfaces, or the not-quite-angular shapes, but retro-inspired kitchens suddenly feel fresh again. But too much of this style could be overkill. The trick is keeping things modern when creating a retro-inspired kitchen. Try using a simple backdrop like white subway tile and adding color in the cabinetry or in one major appliance, like a refrigerator or stove. Or, if remodeling the kitchen just isn't in the budget, there's plenty of fun accessories that will help you get the look. Remember, you don't want anyone thinking they stepped into The Waffle House! Your vintage-style kitchen should look and feel like it lives in the 21st century. There is a vast selection of retro small countertop appliances. I have a red Kitchen Aid mixer that takes a prominent place on my kitchen counter and my friends, Mike and Dianne, have a funky 4 slice toaster that looks as if it were straight out of the 1940’s.
Appliances and cabinets aren’t the only things that are changing to the retro look. One of the hottest new things for the modern kitchen is the “farm or apron style sink”. Once thought of as heavy and of taking up badly needed cabinet space, the farm sink has now become to the modern kitchen what the Mercedes is to your garage and just about as expensive. These sinks come in stainless steel, porcelain finishes and even hand pounded copper. NBS has a complete selection of over 3000 choices priced from $500 to over $3000. Check the website at

http://www.nationalbuildersupply.com/Results.aspx?dsNav=N:140

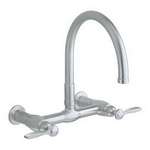
You can also find a full line of faucets that range from the old wall mounted fixtures to the modern Zen waterfall look. These too can add a retro look to your kitchen without changing the major look or by denting the pocket book too badly.
Frankly as much as I am a child of the 50’s and like looking at the old styles which bring back warm memories of my childhood I have no desire to go back to that look in my kitchen and I’m afraid that this is one of those trends whose live span will barely surpass that of the pet rock. After spending a fortune in 2006 completely redoing my kitchen with granite countertops, pine floors, stainless steel appliances and a commercial range hood I have no intention of advocating an orange refrigerator for myself nor anyone else, and frankly if nothing else I’m praying that Mediterranean doesn’t come back.

Wednesday, November 25, 2009

Prevent kitchen disasters on Thanksgiving

Never having been the greatest cook the thoughts of the holidays none the less turn to the thoughts of food and the importance family and a chance to be thankful, even in these times of financial turmoil, for all of the things that we, as Americans, are blessed with and so many take for granted. In trying to come up with a topic today I wanted first to express my own thanks for the things that I have and for my own family and friends. I will be staying put here in Florida this holiday season, just unable to travel due to my declining health and grateful to have made it to another Thanksgiving.
While getting the important part established I still feel the need to leave you with some helpful information to, hopefully make your holiday safer. An article in today’s Fort Worth Texas Star-Telegram, by Alex Branch, reminds us of simple kitchen mistakes that can cause major problems while trying to make the day the best.
“After the big feast today, you might give thanks that your house is still standing and your kitchen sink didn’t overflow. Among firefighters and plumbers, Thanksgiving is known for spikes in fires and clogged pipes. Nationally, firefighters responded to 1,300 cooking fires on Thanksgiving 2007, more than three times the daily average, according to the National Fire Protection Association. Unattended food and items such as dish towels left too close to a heat source were the top causes. Also, food and grease put down drains and garbage disposals cause an unusual number of clogged sewer pipes on Thanksgiving.”
Clogs are easily avoided by collecting bones and meat trimmings in plastic bags and putting them out with the garbage, small amounts of oil should be sopped up with paper towels, try to avoid putting potato peels down the garbage disposal and generally just by using common sense that prevails all through the year that somehow slips our minds in the hurry of preparing the feast. With these reminders in place if you still end up with a clog, just research back through my blogs for helpful solutions or make a generous donation to your local plumber's Christmas fund.

HAVE A WONDERFUL, SAFE AND BLESSED THANKSGIVING.

Sunday, November 22, 2009

When Do You Do-it-Yourself or Call a Pro?

I am, by nature a DIY guy. That’s what I blog about, generally, yet many times I am more likely to recommend that you call a professional to fix some of the household problems that come up. I basically started out adult life with the philosophy that I wasn‘t gonna wash dishes, cut grass and/or change no babies. Needless to say that marriage and my now ex-wife’s opinion changed my mind. I had grown up in the traditional family of the 50’s (that’s the 1950’s) where the children were expected to help with all those things. After dinner you helped with the dishes, I didn’t cook the food and make the mess why should I have to clean it up? Before a ball game, a date, or other activities Saturdays were devoted to yard work and helping to clean the house. My Dad did help my attitude some by buying the first riding lawnmower in our neighborhood and I was so desperate to drive something that even if I was cutting the grass at least I was driving. After I got rid of the old ball and chain and it was just me and the children I adopted a new philosophy, primarily because I couldn’t get my children to help (as a Dad Im a pushover). My new rule was that I could make more money as an accountant than I could by doing household chores and DIY projects so it was easier to pay a portion of that money to a professional and help stimulate the economy (that’s Reagan trickle down economics for those of you uninitiated). Well at least it sounded like a good plan. When my boys were teenagers we had a live in housekeeper who literally spoiled us all including the family dog. who after we were all gone to school and work, was asked and given whatever he wanted for breakfast, lunch and dinner. The dog I have now, Nate, sampled my cooking when I first got him and has never asked for anything but dog food since.
Today and for the past few years I have been retired and frankly unable to afford the luxury of NOT DOING IT MYSELF. So the new rule is if I know that I am competent on how to do it …I DO. If I can’t then I call “crash and burn” Hennecy, my best friend of 42+ years, who has never let being incompetent keep him from doing anything and nearly getting killed in the process. THEN I CALL A PROFESSIONAL. Needless to say usually after paying for the ensuing damage I would have been better off calling a pro to start with and thus my advice as I give it most of the time today.
Here are some common household problems and their potential solutions:
1. Problem: Your energy bill has gone through the roof, and you still feel a chill.
Solution: The energy auditor or rater. These pros come armed with sophisticated equipment to trace even tiny air leaks and will prioritize problem areas in your home. Some local utility companies will send a contractor to you for a free basic inspection. Cost: Zero to $350.To Find One Check out energystar.gov or the Residential Energy Services Network at natresnet.org for a certified rater.
Consider Doing It Yourself When: Don’t mind wearing extra layers of clothes in the winter time while indoors or alternatively no clothes. Or maybe you want to know more about your house from the insulation out. Check your local utility company's website. Many have relatively easy instructions for do-it-yourself energy audits. Or see the U.S. Department eere.energy.gov/consumer.
2. Problem: Despite your best efforts, your house always seems to be a disaster zone. That is to say the least .
Solution: The house cleaner. One person or a whole crew will do the dirty work for you, whether it's a weekly visit or a job every few months -- all in a couple of hours. I have a great struggling lady who keeps my head above dust on a monthly basis, does a great job and charges $10 per hour. Cost can $80 for a single person to $400 for a crew per visit, ranging from maintenance to a deep cleaning. To find one ask friends for referrals, look for notices on local bulletin boards or ads in local papers.
Consider Doing It Yourself When: You're picky about how clean you actually want things cleaned (my neighbor has to clean her house before the housekeeper comes because she doesn’t want the cleaning lady to see the place dirty when she gets there) or where your son stashes his toys or stashes his stash. It may take a bit longer to get the job done, but you'll have the peace of mind of knowing what's where and that its clean to your standards. As to my housekeeper I figure if she hasn’t quit already then Im safe AND she comes with her own shovel to carry out the mess.
3. Problem: Your bookcases are buckling under their heavy load or maybe you don’t even have a bookshelf.
Solution: The carpenter. A professional knows exactly what to do, from choosing the right materials to finding the proper wall studs that will prevent it all from crashing down. Cost Varies considerably. Count on spending at least a few hundred dollars for multilevel shelves. To Find One Ask friends and neighbors for referrals, or contact your local building association at the National Association of Home Builders' website (nahb.org).
Consider Doing It Yourself When: You relish the chance to act as a handyman and break out your power drill. Find a kit with instructions and hardware at a home-improvement or hardware store.
4. Problem: Your hot water isn’t hot or your cold water isn’t cold.
Solution: Maybe an electrician, maybe a plumber or both? Now this is a tricky one. If your heater is electric you may need a new thermostat, new elements, a new circuit breaker or maybe an entirely new heater ( there’s a fine ,line whether that will be a plumber or an electrician that knows a little plumbing. If it’s a new pressure relief valve maybe a plumber is needed. If your heater is fuel fired roll the dice between a plumber and your local fuel provider. To find one, word of mouth words just like with the other problems, the internet, yellow pages (do we still have yellow pages?) but regardless of where you find one make sure they are licensed and insured. Last week one of my neighbors hired a nice young (22 year old) man to do some electrical work (no license/no insurance) and the worker grabbed a 220v line that he thought was turned off but wasn’t. It took the EMT’s 2 hours to remove the body and the homeowner is responsible for the death and damages.
Consider doing it yourself: I don’t recommend anyone DIY a hot water heater, there is just too much that can go wrong.

Friday, November 20, 2009

HOW TO BUILD A STEAM SHOWER


A few days back I released the info that National Builder Supply was adding Kohler products to its vast line of merchandise. I began to look through the NBS website to familiarize myself with the Kohler products and hit on a complicated device that I had never seen before called a “steam generator”.
http://www.nationalbuildersupply.com/Results.aspx?dsNav=Ntk:search|Steam+Shower+Generators|7|&origsearch=Steam+Shower+Generators&altsearch=Steam+Shower+Generators
I immediately thought steam as in heating pipes or maybe hot water heating alternatives so I did some more research and came across an article entitled “The Steam Shower: How It Works”, By JOSEPH D'AGNESE on AOL’s Shelter pop.com , one of my current favorite site for new DIY and green ideas .
NBS has the equipment you need starting at about $700 and going to in excess of $3000 so you can see that this can be a serious DIY project.
Here in an abridged version is part of that article, with full credit given and much thanks extended to Mr.D’Agnese and AOL for its use. This will give you some insight in how you can build yourself a steam shower in your own home.
“Imagine this: It's the end of a long day. You're tired, or achy, or just want to chase away the winter chill. So you push a button in the shower stall, plop yourself down on a bench, and melt into a soothing cloud of eucalyptus-scented steam. Twenty minutes later, you emerge feeling relaxed, renewed, and in the pink. That kind of indulgence used to require a trip to a health spa. But more and more homeowners are opting to re-create the experience at home by turning their ordinary shower stalls into warm, vaporous havens called steam showers. Along with the benefits to your skin and sinuses, there's no standing around waiting for a whirlpool tub to fill or a sauna to heat up -- and when you're done steaming, you just turn on the shower for a refreshing rinse.
To summon steam, you simply hit the digital controls in the shower stall. That triggers an electric valve to fill the breadbox-size steam generator with about a gallon of cold water. Then, just like a plug-in teakettle, the generator's electric element brings the water to a boil. A pipe channels the hot vapor to the steam head, or disperser, which fills the stall with tropical moisture that never gets above a safe 118 degrees Fahrenheit. Luxuriate as long as you want: Steaming for 20 minutes consumes a mere 2 gallons of water. By that reckoning, steam is a "green" way to bathe. (Even a water-saving showerhead sprays about 50 gallons of water in the same period.) Your electric bill is bound to go up, however. Steam units are sized based on the stall's volume in cubic feet, its shape, and what it's lined with. A typical 4-by-5-by-8-foot stall (160 cubic feet) covered with ceramic tile requires at least a 7-kilowatt generator. For a stall tiled in stone, you'll need twice as much steam-generating capacity.

Installation and Costs
Installing one of these at home requires the services of a few pros. First, you'll need a dealer; you can find one locally through the websites of major steam-generator makers, The dealer will find the best spot to hide the generator, which needs to be within 25 or so feet from the shower stall. (A linen or walk-in closet will do nicely, as long as the equipment is easily accessible for maintenance.) Then you'll need a tiling contractor and shower-door installer to build you a steamproof enclosure . When that's ready, the dealer can bring in a plumber to connect all the pipes and an electrician to hook up the generator's 220-volt electric cable and digital controls. All told, the system should run you about $2,500, installed, plus the cost of the new stall and door. Or for about $2,000 to $4,000, you can get a stand-alone, steam-ready enclosure that just needs to have the wiring and plumbing hooked up, though the space-capsule look of such units might be a bit out of place in your elegant master bath.
Steam-shower makers are betting their products will eventually nudge out the tub -- claw-foot, jetted, or otherwise -- as the preferred place to luxuriate in the American bathroom.
A Stall for Steam
The moisture that a steam unit generates will do a number on your shower stall, not to mention your whole bathroom, unless it's built properly from the studs out. Here's how to make a stall steamproof.

1. Slope the ceiling slightly. If you don't, any steam that condenses there will drip down onto your shoulders.
2. Protect wood framing with sheets of 6-mil plastic stapled over studs and joists. Overlap all edges by at least a foot.
3. Seal the seams between the concrete backer-board panels (which are unaffected by moisture) with mesh tape and thinset.
4. Cover every inch of backer board with a waterproof membrane. Use either two coats of a roll-on liquid polymer such as Laticrete's Hydro-Ban, which dries into a seamless, rubbery skin, or embed sheets of flocked polyethylene, like the Kerdi membrane made by Schluter Systems, in wet thinset.
5. Tile and grout as usual. If using stone, apply an impregnator to seal the stone. You'll need to repeat this treatment every two years.
6. Seal around any fixtures that penetrate the tile -- including shower and steam heads, digital controls, and valves -- with the gaskets or O-rings supplied by the manufacturer.”
Remember if you have trouble convincing your wife that your family just HAS TO HAVE ONE OF THESE…remind her that she could use it to steam vegetables, probably would make excellent rice, defrost that Thanksgiving turkey in half the normal time and if that doesn’t work do some research as to the benefits of steam on removing wrinkles. Good luck with that last one, let me know if it works. Comments as always are welcome.

Tuesday, November 17, 2009

Top 12 Home Improvements to Sell your Home Without Spending a lot of Money


Back in August I wrote a blog about things to do to your house to make it easier to sell without spending much money. If you missed it go to:
http://nationalbuildersupply.blogspot.com/2009/08/how-do-i-sell-my-home.html
Now I thought at the time I was real smart. I had watched a lot of the cable shows about how to best fix up your house to sell and more importantly I had been trying to sell my own home without much luck. I had talked to a lot of the real estate agents who had shown my house or had come by on caravans to see it and carefully cataloged their idea and actually tried many of them. I now feel even more confident and vindicated because over this past weekend I ran across an article on Homegain.com where they discussed the top 12 Home Improvements Survey. Results showed that cleaning and de-cluttering was the easiest and most cost-effective way to make your home more appealing to buyers.
Nearly 1,000 real estate agents cast their votes on which do-it-yourself home improvement projects will help sellers get top dollar. For as little as $100-$200, sellers could see as much as a 10x increase in their sale price. To be clear, these are all projects that you can do on your own or with a little help, so you won't see replacing your roof or adding a deck on this list.
Most of the recommended projects come in under $500, with an return on investment of at least 100 percent.
Even for some of the more expensive projects, like updating your kitchen for $1,500, you can replace the hardware and touch up the cabinets, just so that buyers don't see any glaring issues. New appliances are actually very cheap right now, and often come with free installation, so don't let an old fridge or dishwasher kill your deal.The total return on investment for all 12 of these projects could total more than $20,000. For a median priced home, that's about a 10% increase in your sales price. See the chart up above for a complete list and results.

To see the entire article check out the HomeGain HomeSaleMaximizer for customized recommendations in your ZIP code.
http://blog.homegain.com/home-improvement/homegain-2009-top-12-home-improvements-survey-results/

Know that the biggest temptation is to get carried away and spend too much so try to follow the guidelines from this article and from my blog mentioned above. As much as it is hard to believe, prospective buyers want to imagine their own family pictures on the walls of your house not yours. I raised the value of my house and made it much more saleable just by removing the pictures of my ex-wife plus it made the place look much larger.

Monday, November 16, 2009

Ten (10) Things to do to Winterize Your House

In Friday’s blog I started talking about winterizing your home by inspecting and cleaning your hot water tanks. In researching other things that should be done I ran across a great article by Christopher Solomon of MSN Real Estate and have abridged some of his great ideas below and added some of my own.
To read the entire article along with some great links to other resources go to: http://realestate.msn.com/article.aspx?cp-documentid=13107899

Some of Mr. Solomon’s suggestions may seem foreign to those of us in the south but are well founded in the vast reading area of my audience so I’m citing all of them regardless of climate zone.
1. Clean those gutters
Once the leaves fall, remove them and other debris from your home's gutters -- by hand, by scraper or spatula, and finally by a good hose rinse -- so that winter's rain and melting snow can drain. Clogged drains can form ice dams, in which water backs up, freezes and causes water to seep into the house. As you're hosing out your gutters, look for leaks and misaligned pipes. Also, make sure the downspouts are carrying water away from the house's foundation, where it could cause flooding or other water damage. The rule of thumb is that water should be at least 10 feet away from the house.
2. Block those leaks
One of the best ways to winterize your home is to simply block obvious leaks around your house, both inside and out, experts say. The average American home has leaks that amount to a nine-square-foot hole in the wall. First, find the leaks. On a breezy day, walk around inside holding a lit incense stick (try not to get lost in the 60’s) to the most common drafty areas: recessed lighting, window and door frames, electrical outlets. Use door sweeps to close spaces under exterior doors, and caulk or apply tacky rope caulk to those drafty spots, gaskets can easily be installed in electrical outlets that share a home's outer walls, where cold air often enters. Outside, seal leaks with weather-resistant caulk. For brick areas, use masonry sealer, which will better stand up to freezing and thawing.
3. Insulate
Don't clutter your brain with R-values or measuring tape, you should add insulation if you go into the attic and you can see the ceiling joists you know you don't have enough. A ceiling joist is at most 10 or 11 inches so if you should have at least enough insulation to the depth of your joists. A related tip: If you're layering insulation atop other insulation, don't use the kind that has "kraft face" finish (i.e., a paper backing). It acts as a vapor barrier and therefore can cause moisture problems in the insulation.
4. Check the furnace
Turn your furnace on now, to make sure it's even working, before the coldest weather descends. A strong, odd, short-lasting smell is natural when firing up the furnace in the autumn; simply open windows to dissipate it. But if the smell lasts a long time, shut down the furnace and call a professional. It's a good idea to have furnaces cleaned and tuned annually. Costs will often run about $100-$125. Throughout the winter you should change the furnace filters regularly (check them monthly). A dirty filter impedes air flow, reduces efficiency and could even cause a fire in an extreme case. Toss out the dirty fiberglass filters; reusable electrostatic or electronic filters can be washed.
5. Get your ducts in a row
According to the U.S. Department of Energy, a home with central heating can lose up to 60% of its heated air before that air reaches the vents if ductwork is not well-connected and insulated, or if it must travel through unheated spaces. That's a huge amount of wasted money, not to mention a chilly house. Ducts aren't always easy to see, but you can often find them exposed in the attic, the basement and crawlspaces. Repair places where pipes are pinched, which impedes flow of heated air to the house, and fix gaps with a metal-backed tape (duct tape actually doesn't stand up to the job over time). Ducts also should be vacuumed once every few years, to clean out the abundant dust, animal hair and other gunk that can gather in them and cause respiratory problems.
6. Face your windows
Now, of course, is the time to take down the window screens and put up storm windows, which provide an extra layer of protection and warmth for the home. Storm windows are particularly helpful if you have old, single-pane glass windows, these should be replaced but new double pane windows are pricey. Budget to replace them a few at a time, and in the meantime, buy a window insulator kit. Basically, the kit is plastic sheeting that's affixed to a window’s interior with double-stick tape. A hair dryer is then used to shrink-wrap the sheeting onto the window. (It isn’t pretty but it can be removed in the spring)
7. Don't forget the chimney
Ideally, spring is the time to sweep your chimney, but don't put off your chimney needs before using your fireplace, a chimney should at least be inspected before use each year looking damage to the mortar and to the metal damper. Buy a protective cap for your chimney, with a screen to keep out foreign objects (birds, tennis balls) as well as rain that can mix with the ash and eat away at the fireplace's walls. Woodstoves are a different and they should be swept more than once a year. One other reminder: To keep out cold air, fireplace owners should keep their chimney's damper closed when the fireplace isn't in use. For the same reason, woodstove owners should have glass doors on their stoves, and keep them closed when the stove isn't in use.
8. Reverse that fan
By reversing your ceiling fan’s direction from the summer operation, the fan will push warm air downward and force it to recalculate. As you look up, the blades should be turning clockwise.
9. Wrap those pipes
A burst pipe caused by a winter freeze is a nightmare. Prevent it before freezing nights hit. Make certain that the water to your hose bibs is shut off inside your house (via a turnoff valve) or install freeze proof bibs, and that the lines are drained. Drain and stow away your garden hoses. Next, go looking for other pipes that aren't insulated, or that pass through unheated spaces and pipes that run through crawlspaces, basements or garages. Wrap them with pre-molded foam rubber sleeves or fiberglass insulation, available at hardware stores. If you're really worried about a pipe freezing, you can first wrap it with heating tape, which is basically an electrical cord that emits heat.
10. Finally, check those alarms
Now is a great time to check the operation and change the batteries in your smoke detectors. Detectors should be replaced every 10 years. Test them, older ones in particular, with a small bit of actual smoke (although the way I cook, mine get tested constantly), and not just by pressing the "test" button. Check to see that your fire extinguisher is still where it should be, has not expired and still works. Also, as I mentioned in Friday’s blog, the danger of malfunctioning fuel fired heating units and hot water heaters pose a major risk for carbon monoxide poisoning so invest in a carbon-monoxide detector. Every home should have at least one.
These are just a few ideas as to the many things that you can do to get ready for winter, not including what my neighbors have done, which is to close up the house and move to Florida. So if you have some to add to the list click on the “comment” button below and tell us about them or drop me an email.

Thursday, November 12, 2009

GETTING YOUT HOT WATER HEATER READY FOR WINTER

Well I don’t know where you are reading this but I’m at my home in Vero Beach, Fl where the only way you can know that its winter is that neighbors you haven’t seen all summer all of a sudden show back up and the neighborhood and streets are full of cars with strange license plates from far away and foreign places like Rhode Island, Connecticut , and Canada. There are so many Canadians down here that they have their own banks. I don’t know what the banks do during the summer I guess they just sit there waiting for their customers to return and probably holding their hands out for spare bailout money from our government, but I digress. I got in my car this evening and smelled the telltale smell of heat that hasn’t been on in many months instead of cool air conditioning and my thoughts turned to things we should all be doing to get ready for winter.
As always one of the frequent questions that I answer and have blogged extensively about is the water heater. Colder weather makes it even more important that your water heater is functioning well so an inspection either by yourself or more preferably by a paid professional. There are several common preventive measures you can take with your water heater however, to prevent a failed water heater and a subsequent loss of hot water. The primary being the draining and thorough cleaning at least on an annual basis. If your water heater is making odd noises chances are there is sediment building up in the tank due to corrosion. Draining the tank can sometimes cure the problem. Other times, however, it is a sign that water heater element or the water heater itself has reached the end of its life. Water heaters typically have a short lifespan of 5-10 years. You should also inspect for any leakage. Many times the temperature and pressure relief valve will drain outside or into a plumbed drain so you should always be aware if there is any drainage coming from the T&P valve. If you have a fuel fired heater another thing to check is for a partial blockage of the flue and not allowing proper air flow. This could cause an uneven burn of the fuel which could lead to the dangerous situation of carbon monoxide generation which has taken many lives of families while they slept especially during the winter time when the home is sealed more tightly and the HVAC system may only be working sporadically. Remember adequately burning fuel will glow a blue flame.

Beyond the inspection, if you’ve owned a home long enough, chances are you have experienced the morning where you turn on the shower to find no hot water. Water heaters fail for many reasons and always at the wrong time.
One of the most common gas or fuel fired water heater problems is a pilot light that has gone out and will not relight, or the electrical igniter will not fire. Check to make sure that there is gas or oil in the tank and that the fuel valve to the water heater has not been inadvertently turned off. If you are convinced fuel is getting to the water heater, then you will probably need to call a heating repair service to change out the thermocouple or electrical igniter. Thermocouples and electrical igniters frequently fail if they are old and exposed to dust and dirty oil.
If you have an electric water heater the heating elements frequently burn out due to corrosion that occurs inside the water tank. Usually a heating repair service or plumber can quickly replace the heating coil element or if you are adept at light plumbing and electrical work you may be able to do it yourself but be aware that you are dealing with 220v power and a wet environment and that can be a fatal combination. I know how to change out an element and would still call a pro.
If your hot water is either too hot or cold chances are the water heater’s thermostat has either been inadvertently adjusted, failed, or has been damaged. If appears the thermostat has been inadvertently adjusted, try adjusting it yourself and see if the water warms to your preferred level. If the thermostat setting was not inadvertently adjusted then again it is best to call a heating repair service or plumber to replace it.

There are many other things that require winterizing including wrapping vulnerable water pipes and repairing or replacing deficient weather stripping around windows and doors. I will research some more information and pass it on shortly and would welcome suggestions and helpful ideas that you may have.
.

.

Wednesday, November 11, 2009

Old Tubs, Replace, Refinish or Reline?

Recently the talk in the chat rooms and discussion groups has turned to bathtub problems, outdated colors, leaking tubs and the desire to replace old existing tubs with newer, bigger, deeper tubs and with jetted models. There can probably be no more difficult DIY project in the realm of kitchens and bathrooms than the bathtub. The reason is simple, how do you get the old one out and the new one in? In most new construction the bathtub is actually installed during the framing phase of the building so there are no problems with getting a tub through doors, around corners and into place. Now we go 15 years down the road and the wife, better known as “she who must be obeyed”, has decided that the avocado tub that she just had to have when you built the place is no longer in style and needs to be replaced with a new one. To accomplish this you have basically 3 choices, each of which I will try to address here briefly enough to either help you get it done or decide to abandon the idea completely. Neither of the ideas qualify as a DIY project unless you are a well accomplished carpenter and plumber.
Your first choice is to have the old tub refinished with a new surface and new color. There are kits available to do this yourself but the best results come from professional services that do it for you. This, by far is the least expensive route.

The second choice would be to replace the old one, obviously from the good folks at National Builder Supply prefer, from their over 600 item selection: http://www.nationalbuildersupply.com/Results.aspx?dsNav=Nrc:id-103-dynrank-disabled,N:114
But before doing that you have to figure out how to get the old tub out and the new tub in. If you’re lucky the old tub is fiberglass and can be sawed into small pieces with a reciprocating saw and carried out a chunk at a time. If the old one is cast iron then you’re faced with idea of clearing your way to the nearest exit by tearing out doors and walls and then bring the new one in the same way. The other alternative might be that the old tub is on an exterior wall that can be opened and removed. Either way you can see that it’s not going to be easy and something that you won’t want to do but once. Maybe just buy her a new house with the tub of her choice.

The third solution is to install or have installed a tub liner over the old tub. A tub liner is a new fiberglass or acrylic tub shell that actually fits right over your old tub. There are a number of companies that offer these the most notable one is “Bathfitters” but this is not intended as a recommendation for them because I have no experience to relate. In researching this subject I ran across an interesting article on About.com entitled “About Bathtub Liners”, By Erin Loechner, from Oct 20th 2009. View the entire article at:
http://homerenovations.about.com/od/bathrooms/a/arttubliners.htm

Liners are new "skins" for your bathtub, shower pan, or walls. They are installed over your existing tub or shower; nothing is removed. Liners are made of heavy gauge acrylic. This is the same material that new, pre-fabricated bath and shower stalls are made of. So, if you were to demolish your bathroom and put in a new pre-fab unit, this is the same material that the pre-fab unit is made of. You can re-line just the bathtub or shower pan itself, or you can also add wall surrounds. Here are the pros and cons the author sees them:

Five Reasons Why Not to Consider a Bathtub or Shower Liner
1. A Cover-Up, Not a Solution:Liners cover up underlying problems instead of fixing them. The moisture in bathrooms can create mold and even eat away at structural elements which need to be replaced.
2. Trapped Water:Possibility of water getting trapped between liner and tub, creating mold and mildew.
3. Hollow Feeling:Liners may feel "spongey" or less than stable under foot.
4. Pricey:Liners are more expensive than refinishing.
5. Reduced dimensions:Because you are adding material, your bathtub will become smaller.
Five Reasons Why You Might Consider a Bathtub or Shower Liner
1. A Quick Fix:It's a faster fix than completely demolishing and replacing your bathroom.
2. Cheaper Than a Full Remodel:While more expensive than refinishing, it's cheaper than a full-on bathroom remodel.
3. Covers Up Icky Walls, Too:Refinishing only takes care of the bathtub itself or the shower floor pan. If your walls look like a warzone, refinishing won't help. But it is possible to order wall surround liners to cover up this mess.
4. No Demolition:Demolition is necessary for a full bathroom remodel. The tub and shower have to be ripped out, and surrounding materials will get damaged and must be replaced. Liners do not require demolition.
5. Competitive:Tub relining is one of those home remodeling industries like vinyl siding and window replacement: there are a lot of companies out there competing for your business. You should be able to find a company that will work with you.
Many thanks to About.com for this and their many great articles some of which are mine also.

Either of the 3 choices entail a great deal of thought, planning and money. Maybe an attractive shower curtain pulled over that old tub would be a better solution?

Monday, November 9, 2009

HOW TO INSTALL A GFCI RECEPTACLE

Those of you who regularly read my blithering s know that my best friend for some 42 years is Mike Hennecy, better known to family and friends as ‘Crash and Burn”. Know he did not get this nick name from being a race car driver, although if you ride with him you might certainly think that’s where he learned to drive, nor did he come by it from a major number of car crashes. Instead he earned the title by being the most frequent victim of DIY electrical shock accidents and for having been struck by lightning twice, once where the lightning chased him into his garage. With this in mind ,if you have even a close resemblance to his history. just stop reading this now and call and electrician. If instead you have had pretty good luck say changing light bulbs then you may have a reasonable chance of pulling off today’s project…INSTALL A GFCI RECEPTACLE.
Have you ever experienced an electric shock? If you did, the shock probably happened because your hand or some other part of your body contacted a source of electrical current and your body provided a path for the electrical current to go to the ground, so that you received a shock.

A "GFCI" is a ground fault circuit interrupter. A ground fault circuit interrrupter is an inexpensive electrical device that, if installed in household branch circuits, could prevent over two-thirds of the approximately 300 electrocutions still occurring each year in and around the home. Installation of the device could also prevent thousands of burn and electric shock injuries each year. By most codes, today, any electrical receptacle (plug) within and arms reach of a water faucet, sink, tub, shower or that can be found on the outside of your home should be a GFCI. You will recognize it by the usual black and red buttons in the middle labeled “TEST” and or “RESET”. In the home's wiring system, the GFCI constantly monitors electricity flowing in a circuit, to sense any loss of current. If the current flowing through the circuit differs by a small amount from that returning, the GFCI quickly switches off power to that circuit. The GFCI interrupts power faster than a blink of an eye to prevent a lethal dose of electricity. You may receive a painful shock, but you should not be electrocuted or receive a serious shock injury.

Here's how it may work in your house. Suppose a bare wire inside an appliance touches the metal case. The case is then charged with electricity. If you touch the appliance with one hand while the other hand is touching a grounded metal object, like a water faucet, you will receive a shock. If the appliance is plugged into an outlet protected by a GFCI, the power will be shut off before a fatal shock would occur.
If your home is older and you don’t have these GFCI receptacles in the necessary places no need for a panic thay are inexpensive to purchase and simple to install.
Here are the simple steps to change out a regular outlet to a GFCI:
1. Acquire a new GFCI outlet. They are available at any hardware or big box store.
2. When you're ready to install, first shut off power to the outlet.
3. Use a voltage detector to confirm that the power is off. This is where Mike would test it by grabbing the black and white wires with his bare hands…DON’T DO THAT.
4. Remove the old face plate
5. Remove the retaining screws holding the receptacle in the outlet box and pull it out so that you can access the wiring
6. Remove the wires off of the old unit. There should simply be a black (hot), a white (the neutral) and a green (the ground)
7. Now you are ready to install the new GFCI receptacle. Attach the correct wires to the correct locations. Usually the black wire will attach to a brass screw, the white to a silver screw and the green will attach to a blue screw. If you do not find the attachment points to be of this configuration then consult your instructions. I know this goes against all that is in the “Man’s Handbook” but do it just this time. Some newer style receptacles don’t even have screw connections but instead will have quick connect holes that just grab the wires and hold them in place just by you inserting the bare wire into the hole.
8. Once you have the wires connected wrap electrical tape around the receptacle so that it covers all the screw heads on both sides. This will make it easier and safer to deal with in the future if you have to open the receptacle and it holds the wires in place while you are now finished and ready to reinstall the outlet back into the junction box.
9. Insert the receptacle into the outlet box, folding the wires carefully as you insert
10. Tighten the mounting screws
11. Install the mounting plate
12. Turn the power back on, and test the receptacle with a voltage tester.
13. The installation is complete. You are now ready to enjoy new (and safe) GFCI outlet.

All GFCIs should be tested once a month to make sure they are working properly and are protecting you from fatal shock. GFCIs should be tested after installation to make sure they are working properly and protecting the circuit.

To test the receptacle GFCI, first plug a nightlight or lamp into the outlet. The light should be on Then, press the "TEST" button on the GFCI. The GFCI's "RESET" button should pop out, and the light should go out.If the "RESET" button pops out but the light does not go out, the GFCI has been improperly wired. Review your wiring steps one by one and if the GFCI still doesn’t work properly contact an electrician to correct the wiring errors.

Friday, November 6, 2009

KOHLER NOW AVAILABLE AT NATIONAL BUILDER SUPPLY

PRESS RELEASE, ATLANTA NOVEMBER 6, 2009

NATIONAL BUILDER SUPPLY BECOMES NEWEST KOHLER DEALER

Marcus Morgan, Owner of National Builder Supply and the affiliated H.M.Wallace Companies takes pride in announcing that they have become the newest and soon to be the largest online Kohler Plumbing Products dealer. "Kohler known for its innovation in style and color has become a real trend leader in the American home today and National Builder Supply has become known as a major source for value and customer service in the online market. It was only a matter of time before the two companies joined forces to offer both to the public."
National Builder Supply currently has an inventory of over 4500 individual Kohler items for their customer’s selection at guaranteed lowest pricing and as always with free freight for all orders over $100 shipped to the contiguous 48 states.

To view the vast variety of Kohler products available, visit the NBS website today at:

http://www.nationalbuildersupply.com/Results.aspx?dsNav=Ntk:search|Kohler|7|&origsearch=kohler&altsearch=Kohler

Some of the best selling Kohler products available are:

K-394 BATHROOM FAUCET AT $160.38 (a 36% DISCOUNT FROM MSRP)


K-596 PULLOUT KITCHEN FAUCET AT $169.60 (A 36% DISCOUNT FROM MSRP)


K-973 HANDHELD SHOWER AT ONLY 85.79


K-6626 CAST IRON SINKS AVAILABLE IN 19 DIFFERENT COLORS BEGINNING AT $379.30


QUESTIONS? CALL YOUR FRIENDLY COMMITTED CUSTOMER SERVICE STAFF AT NBS AT (866) 355-0310 FOR HELP IN CHOOSING THE BEST KOHLER PRODUCTS FOR YOUR HOME

Wednesday, November 4, 2009

5 Easy Steps to Green your Kitchen

Over the weekend I was surfing the channels on TV, desperate to find anything other than politics to watch, and ran across a discussion about the amount of bacteria found on kitchen counters, cutting boards and especially the dreaded kitchen sponge. Well suffice it to say I spent the rest of the weekend trying to work out my meager monthly budget so that I could eat out all of my meals from now on because I’m sure that my kitchen will have to be napalmed to get it sanitary. I’m surprised that I haven’t either killed someone or myself with the exotic strains of bacteria that must be growing in my kitchen. I think I will have to have it condemned as a biohazard and apply to the EPA superfund for a grant to have it cleaned. Remember, folks, I’m an ole single guy and even in my good days was never much on cleaning. Consider yourself warned as to the dangers that might lurk in your own kitchen and use the article below from AOL’s “Shelterpop” about how to “green your kitchen in 5 easy steps.

http://www.shelterpop.com/2009/08/14/green-your-kitchen-in-5-easy-steps/

”If you're thinking about improving your carbon footprint, your kitchen might be one of the most important places to start. The ugly truth about what we use to clean our homes is quite unsettling, but if you put your best eco foot forward with these five easy steps, you can have a cleaner, greener and healthier kitchen.
1) Textile Transformation. Consider replacing your current textiles with organic cotton fabrics, reusable dish cloths. Use old dish towels as dust cloths instead of tossing them.
2) Clean Green. Try to use cleaners with less chemicals, like. Replacing a few of your old cleaners with more natural cleaners will instantly help the environment and protect your family against harsh chemical residue and fumes from chemical irritants such as bleach, carpet cleaners, aerosols, air fresheners or ammonia.
3) Just Bamboo It. Use bamboo cooking and baking utensils. A few years ago, I noticed that some of my plastic ones started melting and chipping into my food, and I quickly went out and purchased a fairly inexpensive bamboo products and kitchen accessories.
4) Save Energy. Replace your light bulbs with low-impact lighting, and make good use of natural light whenever possible. If you're in the market for new appliances, be sure to look for Energy Star appliances because they save energy and money!
5) Throw it away and feel OK. Did you know you can even get recycled trash bags or biodegradable cups and dishware? If it absolutely has to be thrown away, why contribute to landfill trash? Go biodegradable, and lose the guilt.”

I hope you find this info helpful and additionally pay more attention to cleanliness in your kitchen. Throw away that kitchen sponge and replace it with easily washed or sanitized textiles that are biodegradable or at least inexpensive enough that you can just toss it out and not feel like you have to keep the thing lying on your sink growing the next form of super bacteria.

Monday, November 2, 2009

A Little late for Halloween but in time for Thanksgiving...A Kitchen Horror Story

Well , I may be a couple of days late for Halloween but I saw an interesting article on the Ivillage series of discussion forums that got me to thinking about kitchen horror stories. The article on Ivillage was “6 Kitchen Horror Stories” http://food.ivillage.com/holiday/halloween/1,,g3jghcxq,00.html
and is fun reading and something can be learned from all of them but they are from the viewpoint of the professional chef.
My horror story is a little more simplistic, I think funny and far more day to day. When my ex-wife first married I found out that what she made best for dinner was reservations. She had come from a home where home cooked meals meant simply opening a can and warming something up was the norm. I had come from a home where both parents worked and my Mom, bless her heart was no “June Cleaver”. When the subject of the kitchen came up she would turn to my Dad and ask…now the kitchen? Is that where the refrigerator is? So needless to say my cooking education was somewhat limited too so putting both my wife and my experiences together to provide our first home cooked meal meant calling my Grandmother for advice. Like most young couples we were anxious to have another young couple as friends and invited the now famous Mike (Crash and Burn) and Dianne Hennecy over as our first guests. I called my grandmother and asked what could we fix and she said fried chicken would be the easiest along with mashed potatoes and gravy and a vegetable. I carefully took down all the recipe instructions, after it had become all to obvious that I couldn’t talk her into coming over to cook it for us, and we embarked on our first meal. It went something like this:
1. Flour , salt and pepper in a paper bag, soak chicken pieces in butter milk, heat cooking oil (Crisco back in those days) in skillet, flour the chicken by shaking it in the bag and fry it til golden brown in the oil. No time was mentioned so we dutifully fried the chicken for about 5 minutes, it looked beautiful but when we bit into it at the table, of course, it was raw and cold inside. Well maybe the gravy and mashed potatoes would be enough.
2. To make the gravy my grandmother had said to take the balance of the flour in the paper bag and use it to dry up the cooking oil in the skillet, brown it add the butter milk from soaking the chicken and Voila! Gravy. Well we had a skillet full of oil. When we poured the flour in there wasn’t enough to dry it up so we just kept adding flour. Honestly as the flour began to grow there was never a point where we had time nor room enough to add the buttermilk, the gravy was taking on a life of its own. You could turn the skillet upside down and the gravy would not come out and actually looked more like really nasty bread. So maybe we will just have buttered mashed potatoes? By now my wife was in tears.
3. Mashed potatoes, easy, peel , dice, boil and mash. How long to boil them? Well we never found out because while playing with the gravy we let the water boil out of the potatoes and when we tried mashing the ones that weren’t burned to the bottom of the pan, we found that you can’t easily mash nearly raw potatoes. Well we still had bread (store bought) we would serve with butter for lack of gravy (actually there was plenty of gravy it just didn’t look like gravy), the yet to discover raw chicken and a vegetable (from a can) my wife’s mother’s contribution to the dinner.
We tried to make the best of it by setting a pretty table with all of the china, crystal and silver we had received for wedding presents but no amount of fancy table ware can make raw chicken, raw mashed potatoes and canned vegetables into a wonderful meal . We ate out, my wife spent the whole night crying, which became a typical thing for her to do, and 42 years later Mike and Dianne are still my best friends and the wife is long gone and probably still cant cook any better than she did that night. I’m a little better at it but only because I watched a lot of cooking shows on PBS.
So read the article on Ivillage, be reminded and maybe share with us one of your own kitchen horror stories.